Your Bike Chain Keeps Falling Off — And Here’s What’s Actually Going On
Bike chain problems have gotten complicated with all the conflicting advice flying around. Drop it on a climb once and suddenly everyone’s got a theory — cable tension, chainring bolts, some YouTube fix that takes 45 minutes and solves nothing.
As someone who spent three full seasons watching my chain fall off mid-ride, I learned everything there is to know about why this happens. I tightened derailleur cables. I swapped limit screws. I replaced the chain twice — a Shimano HG601, then a KMC X11 — and the drops kept coming. The actual problem? My front derailleur cage was sitting about 2mm too high. Lowered it. Problem gone. Just like that. That was 2021, and I haven’t had a drop since.
Today, I will share it all with you. The three real causes, how to tell which one is yours, and how to fix it without wasting Sunday afternoon guessing.
Figure Out Why the Chain Is Actually Dropping
Probably should have opened with this section, honestly. Most people grab a 5mm hex key and start turning things before they even know what broke. One minute of looking saves you twenty minutes of making things worse.
Chain drops follow patterns. Yours fits one of them.
- Does it drop only on the small chainring? Front derailleur misalignment — specifically the L-limit screw. The cage isn’t sitting right to catch the chain on downshifts.
- Does it drop on the big ring when you’re hammering? Start with the chainring teeth. Worn teeth can’t hold the chain under hard pedaling. It skips. It falls.
- Does it drop on both rings, inconsistently, with sluggish shifting throughout? Chain stretch. The whole drivetrain is sloppy and nothing engages cleanly.
- Did this start right after you cleaned the drivetrain? You bumped something. A cable, the cage position, something. Realignment fixes it.
So, without further ado, let’s dive in.
Front Derailleur Out of Position
But what is front derailleur misalignment, exactly? In essence, it’s when the cage that guides your chain onto the rings sits at the wrong height, angle, or both. But it’s much more than that — even a half-millimeter off can mean consistent drops on one specific ring while everything else feels fine.
Here’s the target: outer cage plate sits roughly 2mm above the tallest tooth on your big chainring. The cage runs parallel to the chainring plane — not angled inward, not canted out. Both conditions have to be true.
Height matters more than most people think. Too high and the chain pops over the top during hard sprints or upshifts. Too low and it jams between the ring and the cage itself — which sounds horrible and feels worse.
To check yours, shift to the big ring and look at the cage from the side. A business card works as a rough gauge for that 2mm gap. Check the gap at the front of the cage and the back. If it’s uneven, the derailleur is either bent or the clamp has rotated slightly. Both are fixable.
For small-ring drops: The L-limit screw is what you want. Marked “L” on the derailleur body, usually near the cable anchor. This screw controls how far inboard the cage can travel. If your chain drops inboard on downshifts, the L-limit is set too far in — turn it counterclockwise in quarter-turn increments. One full rotation moves the cage about 1mm. Test after each turn. Don’t skip the testing part.
For cage angle issues: Loosen the clamp bolt — 4mm or 5mm hex, single bolt on most derailleurs — and rotate the entire assembly until the cage plates sit parallel to the rings. Look from the front, then the side. Tighten. Done.
If the cage is visibly bent, just replace it. A Shimano 105 front derailleur runs around $45–$55. SRAM Force is closer to $75–$80. Bent cages don’t stay aligned no matter how much you fiddle — don’t make my mistake of spending two hours adjusting something that needed replacing.
Worn Chainring Teeth
Worn chainring teeth have a look — sharp, asymmetrical peaks instead of that smooth, rounded profile you see on a new ring. Mechanics call it “shark fin” wear. Once you’ve seen it, you can’t unsee it.
It builds up slowly. Upshifts get sluggish first. Then downshifts feel rough and imprecise. Eventually the chain starts dropping under load, especially on hard accelerations where the drivetrain is under real stress.
Inspection is simple — shift to the big ring, crouch down, and look at the tooth profile from the side. Compare adjacent teeth. New teeth look almost uniform. Worn teeth have one side visibly taller and thinner than the other. If you’re seeing that, wear is significant enough to cause problems.
Lifespan varies wildly. Road chainrings on a well-lubed, clean drivetrain might go 10,000–15,000 miles. A mountain bike ring in dusty trail conditions? More like 3,000–5,000 miles. Aluminum wears faster than steel. I’m apparently a heavy pedaler, and my 104 BCD aluminum ring on a gravel setup needed replacement every 18 months or so — your mileage may literally vary.
There’s no adjustment for worn teeth. Replacement is the only fix. Individual chainrings run $35–$120 depending on material and tooth count — most modern cranksets let you swap a single ring without replacing the whole crank. Worth doing before it destroys the cassette too, which costs considerably more.
Chain Stretch Making Everything Sloppy
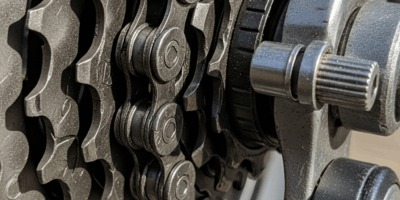
Chain stretch is a misnomer — the chain isn’t stretching like a rubber band. What’s actually happening is that the pins and rollers are wearing down, creating tiny gaps between links that accumulate over thousands of miles. The chain gets effectively longer. It sits loosely on the teeth and drops more easily.
That’s what makes this problem endearing to us mechanics — it doesn’t announce itself. Drops come and go, inconsistently, depending on which worn links happen to be sitting on which teeth at that moment. Diagnosis feels slippery until you actually measure.
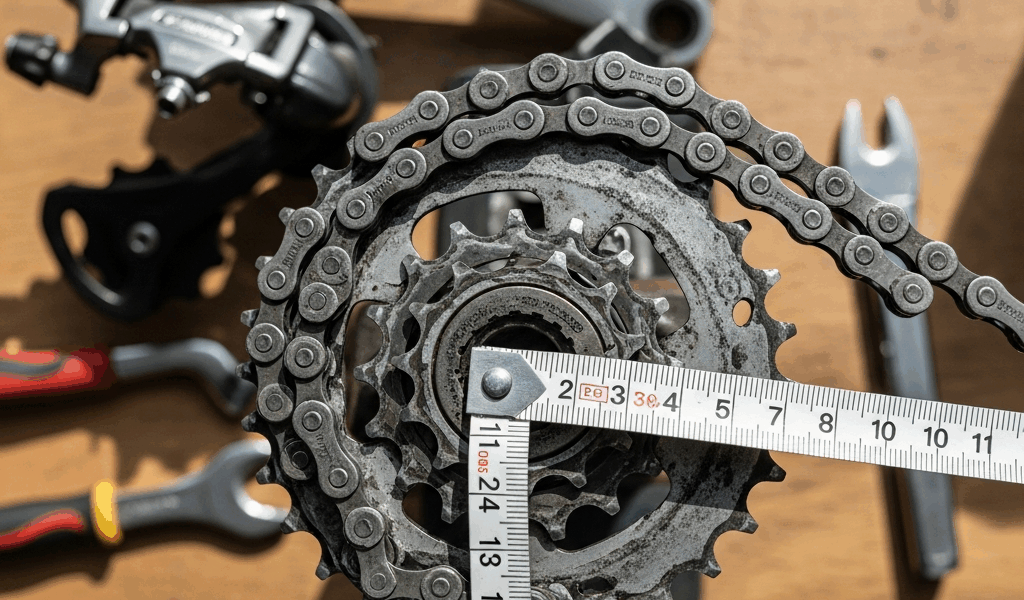
Grab a chain checker tool — the Park Tool CC-4 runs about $12, the KMC version is similar. Two pins, spaced at one inch. Insert them into the chain. If the tool drops through at the 0.5% mark, you’re close to the limit. At 0.75%, the chain is done and has probably already started wearing your cassette.
No tool? A standard ruler works. Ten links on a new chain measure exactly 5.0 inches, pin to pin. At 5.04 inches or more, it’s time. That extra 0.04 inches doesn’t sound like much across ten links — across the full chain, it’s significant.
A solid replacement chain — Shimano, SRAM, KMC — costs $25–$50. Replacing it at 0.5% wear instead of waiting until 0.75% is the single cheapest thing you can do to extend the life of your cassette and chainring. A badly worn chain will destroy a new cassette in a matter of months.
Worn chain plus worn ring is a feedback loop that gets expensive fast. Fix the chain first. Ride it clean for a week or two. Then reassess the chainring.
Keeping It From Happening Again
While you won’t need a full workshop setup, you will need a handful of basic tools and a fifteen-minute maintenance routine every couple of weeks.
First, you should clean the drivetrain regularly — at least if you ride more than twice a week. A brush, some degreaser, and a rag. Skip the pressure washer. Dirt is the main accelerant for every kind of wear discussed here. Five minutes of cleaning buys you months of added component life.
Check cable tension monthly. Cables relax over time — it’s normal, not a sign something is wrong. A quarter-turn on the barrel adjuster usually brings a sluggish front derailleur back to life. Left unattended, slack cables cause poor shifts that turn into chain drops.
A chain guide might be the best option for mountain and gravel riders, as rough terrain requires impact protection the derailleur alone can’t provide. That is because chain slap over rocks and roots creates the kind of sudden slack that even a perfectly adjusted system can’t handle. The Wolf Tooth Goat Link runs about $45. The E-Thirteen TRS Race is closer to $65–$90. Road bikes don’t need them, but off-road bikes genuinely transform with one installed.
Replace the chain before it hits 0.75% wear. Seriously — it’s a $30 part protecting $80–$150 worth of cassette.
If the derailleur is bent or drops persist after going through all of this, take it to a shop. A derailleur alignment and cable tension service runs $30–$60 at most places. Sometimes the right call is handing it to someone with a stand and fresh eyes.


Stay in the loop
Get the latest cycling gear galaxy updates delivered to your inbox.