First Thing to Do When You Get a Flat
Fixing a flat bike tire has gotten complicated with all the conflicting advice flying around. As someone who has limped home on a destroyed rim more than once, I learned everything there is to know about roadside tire repair. Today, I will share it all with you.
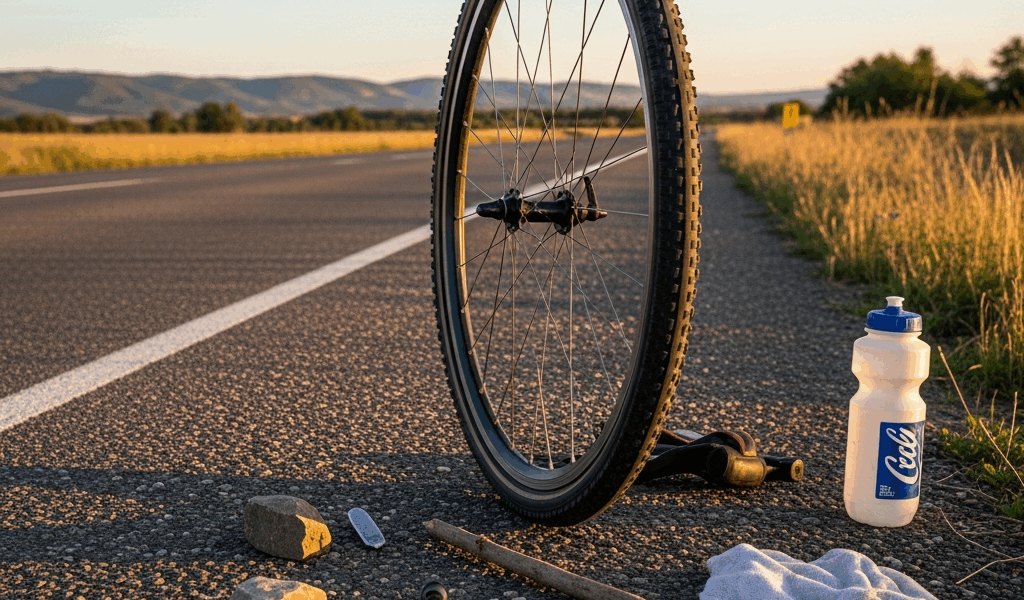
It was a Tuesday in October. Mile 8 of a 15-mile ride. That unmistakable hiss. I had nothing — no kit, no levers, just my phone and a growing certainty that I was about to start walking. That experience changed how I think about flats entirely.
So, without further ado, let’s dive in.
Get off the road first. Seriously — don’t crouch over your wheel while a pickup truck clips by at 55 mph. Move at least 10 feet into grass or gravel. Then sit down for 30 seconds. Just breathe. A flat is fixable. I’ve fixed dozens without a kit, and I’ll show you exactly how.
Then figure out what you’re actually dealing with. Press your ear near the tire. Still hissing? That’s a small puncture — good news. Already completely flat and you remember smacking a pothole hard? That’s probably a pinch flat or blowout. The distinction matters because what you do next changes depending on the answer.
For tubeless tires specifically — wait. Some punctures seal on their own within 30 seconds. Spin the wheel slowly and let gravity pull the sealant toward the hole. I once watched a 2mm thorn seal itself on a Specialized Turbo mid-descent on gravel. The sealant pooled, blocked the hole, and that was that. Give it two full minutes before you do anything else.
How to Change a Tube With No Tire Levers
Clincher tires — the standard type on most bikes — can come off by hand. This isn’t some mechanic secret. It’s just leverage and patience.
Start opposite the valve stem. Pinch the tire bead between your thumb and forefinger — the bead is the stiff edge that locks into the rim channel. Roll your thumb upward, pushing the bead toward the center of the rim. It feels strange the first time. It works every time.
Keep that same thumb-roll motion going around the tire. You only need one bead free, not both. Once you’ve worked loose roughly half the wheel, grab that section with both hands and pull firmly outward. The tire pops off. Sometimes dramatically.
Now the tube. Press the valve core to deflate completely, then wiggle the tube out gently. Don’t yank — I tore a tube once doing exactly that and had to knot it, which I’ll get to shortly. Patience here saves you later.
Small hands or a particularly stubborn tire? Use your quick-release skewer as a lever. I did this on a Trek Domane with Continental Grand Prix tires that felt practically welded to the rim — slipped the skewer tip under the bead, pried gently, moved a few inches, pried again. Never force one spot. Keep moving around the wheel.
Before the new tube goes in, run your finger slowly along the inside of the tire. Feel for glass, thorns, anything sharp. I once reinstalled a fresh $8 Kenda tube only to puncture it immediately because I missed a 3mm piece of flint. Don’t make my mistake.
Installing the new tube without levers is also straightforward. Inflate it just enough to hold its shape — maybe 5 to 10 psi, no more. Feed the valve through the rim hole first. Work the bead back on using the reverse of the thumb-roll, starting at the valve and moving both directions simultaneously. The last section — opposite the valve — gets tight. Use your palms, not your fingertips. Fingertips pinch the tube. Pinched tubes fail immediately. That’s the most common mistake people make, and it’s completely avoidable.
What to Do If You Have No Spare Tube Either
Probably should have opened with this section, honestly.
Some riders carry nothing. I’ve been that rider. Once. Never again, but we’ll get to that.
The boot method is your first line of defense here. You need something thin and flexible — a folded dollar bill works, so does the foil wrapper from a gel packet, a strip of old tube, or a piece of torn sidewall from a junked tire if you happen to be near a trailhead. That material goes inside the tire, directly over the puncture hole, acting as a reinforcing patch beneath the tube.
But what is a boot, exactly? In essence, it’s a temporary internal barrier between a damaged tire casing and your tube. But it’s much more than that — it’s often the difference between riding home and calling someone to come get you.
Place the boot over the hole on the inside of the tire casing. Reinstall your punctured tube — carefully — and inflate partially. The boot prevents the tube from ballooning through the hole and blowing out completely. Realistically, this buys you 5 miles. Maybe 10 if the puncture is small and you keep your speed down.
The knot method is your other option for a small puncture. Tie a simple overhand knot directly in the tube, cinching it tight right over the hole. This cuts off airflow to the damaged section entirely. I’ve ridden 2 miles on a knotted tube — it’s slow, slightly wobbly, and you’ll feel the lump on every rotation. But you’ll move. That’s what matters.
Be honest about distance, though. These are emergency measures, not solutions. Twelve miles from home? Neither method gets you there. You’re calling for a ride, walking to the nearest bike shop, or flagging down someone you trust. Accept that early — don’t spend 45 minutes attempting fixes before admitting it.
Fixing a Tubeless Flat on the Side of the Road
Tubeless setups are their own category entirely. No tube exists to replace. The tire seals directly against the rim, with liquid sealant — typically Stan’s NoTubes or Orange Seal — coating the inside and plugging small holes automatically.
Most punctures under 3mm just seal. Spin the wheel through a few rotations. Hold it at different angles. Wait five minutes, then reinflate with whatever you have. Done. That’s what makes tubeless endearing to us gravel and trail riders — the flat that isn’t really a flat.
Larger holes need a plug. A tubeless plug kit — the Dynaplug Micro Pro runs about $35, the Lezyne Tubeless Pro Kit around $18 — includes a sticky rubber strip and an insertion needle. Roughen the hole edges slightly with the tool, insert the plug, withdraw the needle, leave the rubber behind. Reinflate with a CO2 cartridge or a hand pump. Ride away.
No CO2 and no pump? You’re genuinely stuck. Hand-inflating a tubeless tire is nearly impossible — the sealant actively resists airflow and the bead won’t seat without pressure. You’d need a floor pump with a large chamber, or an electric inflator like the Fumpa Mini at minimum.
If the hole won’t seal and you have no plug, convert to clincher. Deflate fully, install a standard inner tube — a 700×25-32mm tube works for most road and gravel setups — seat the bead, inflate. You’ve temporarily converted your tubeless wheel into a tubed clincher. It’s not ideal. It gets you home.
How to Not Be Stuck Like This Again
A small saddle bag fixes all of this permanently. One spare tube. Two plastic tire levers — Pedros and Park Tool both make decent ones for around $5 a pair. A Lezyne Pressure Drive hand pump at roughly $30, or two CO2 cartridges with a valve head adapter if you prefer compact. A tubeless plug kit if you run tubeless tires. The entire setup weighs under 200 grams and fits in a bag smaller than a cycling gel.
Total cost lands somewhere between $25 and $45 depending on your choices. I’m apparently a hand-pump person — the Lezyne Pressure Drive works for me while CO2 cartridges never feel reliable enough when I actually need them. That’s just personal preference. The Knog Plugger tubeless kit costs $8 for a two-pack and has saved me twice. One spare Kenda tube runs $5 at most shops.
While you won’t need a full workshop in your jersey pocket, you will need a handful of these basics on every single ride. First, you should assemble the kit this week — at least if you ride more than 5 miles from home regularly. A dedicated saddle bag might be the best option, as roadside repair requires everything to be accessible fast. That is because fumbling through a backpack at the side of a road while your hands shake is its own kind of problem.
Keep the kit on your bike. Every ride. I left mine at home once — just once — and got a pinch flat in the rain, four miles from nowhere, in October. Sound familiar? Don’t make my mistake.

Stay in the loop
Get the latest cycling gear galaxy updates delivered to your inbox.