Why Your Bike Tires Keep Going Flat Overnight
Flat bike tires have gotten complicated with all the bad advice flying around. You go to bed with properly inflated tires. You wake up and both rims are nearly kissing the ground. No torn sidewall. No visible puncture. Just flat — and no obvious explanation for any of it.
As someone who spent three full seasons doing courier work in a city that treats potholes like architectural features, I learned everything there is to know about mysterious overnight flats. Today, I will share it all with you.
The worst part of this problem isn’t the flat itself. It’s the mystery. A blowout from a nail or glass shard — fine, you see that coming. But waking up to a completely flat tire with zero visible culprit makes riders absolutely crazy. Most articles online tell you to look for punctures and call it a day. They miss the real story entirely.
Why your bike tires keep going flat overnight usually isn’t about a dramatic puncture at all. But what is a “slow leak,” really? In essence, it’s air escaping through a failure point too small to announce itself with a hiss or a visible hole. But it’s much more than that — it’s a valve problem, a rim tape failure, a bead seat issue. Things that are genuinely confusing to diagnose. That’s what makes this problem so maddening to cyclists who just want to ride.
The Most Common Reasons a Bike Tire Loses Air Slowly
So, without further ado, let’s dive in. Here’s the quick version — five things kill tire pressure overnight without any drama whatsoever.
- A loose or faulty valve core that lets air seep past the seal
- Rim tape that’s shifted, torn, or missing — exposing spoke holes directly to the tube
- An improper bead seat where the tire sidewall doesn’t sit flush against the rim
- A micro-puncture so small you can’t hear air escaping, often from a wire fragment or glass sliver
- In tubeless setups, sealant that has dried out or clotted after months of sitting unused
Start with the first one. Easiest fix on the list. Also the one most riders never consider.
How to Tell If Your Valve Core Is the Problem
Your valve core is a tiny threaded component inside the valve stem. It handles the one-way seal — air goes in, not out. When it fails, you get a slow, steady leak that can empty a 700c road tire completely overnight.
Testing it is dead simple. Mix a small bowl of dish soap and water — nothing fancy, just whatever’s under your kitchen sink. Pump the tire to full pressure. Apply the solution directly to the valve stem with a sponge or wet cloth, focusing right on the tip where the core sits. Bubbles forming and growing? You found it. Congratulations.
For a Presta valve — the skinny one with the tiny brass knob on top — grab a valve core tool. They run about $8 on Amazon, Park Tool makes a good one, and honestly they’re worth far more than that. Unscrew the brass knob all the way. Insert the hex head into the valve and tighten it by hand. Don’t crank it. Just snug. Test again with soapy water.
If tightening doesn’t stop the bubbles, the core itself is damaged. Unscrew it completely with the core tool and pull it out. Replacement cores run $3 to $5 at any bike shop — Presta or Schrader, depending on your setup. Schrader valves are the car-tire-looking ones. Same basic logic applies, though some shops stock a different core remover style for those. Thread the new core in by hand, snug it with the tool, and test one more time.
No bubbles? Done. This single fix has solved more overnight flat mysteries than anything else I’ve ever tested on my own bikes. Don’t make my mistake of replacing three tubes before I finally checked the valve.
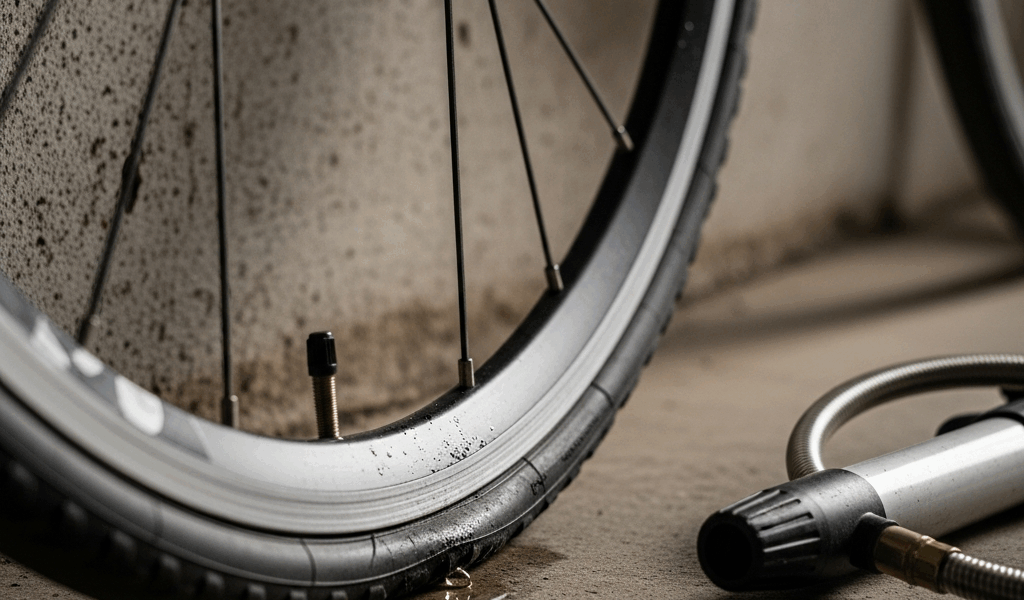
Checking Your Rim Tape for Gaps or Damage
Probably should have opened with this section, honestly.
Rim tape might be the single most underestimated component on a bicycle. Your rim has spoke holes drilled straight through it. Without tape covering those holes, the tube presses directly against spoke nipples and sharp metal edges. Over months and miles — especially on rough city streets — the tube gets pinched and abraded until it develops a leak so gradual it takes a full night to flatten completely.
Rim tape shifts. It tears. It wears thin. Especially on cheaper bikes where it gets applied carelessly at the factory. I’m apparently rough on equipment and Schwalbe rim tape works for me while the stock tape that came on my old Kona commuter never lasted a full season.
To inspect yours, deflate the tire completely. Use tire levers to pry one side of the bead off the rim — start opposite the valve stem. Pop the tube out. Now look directly at the rim surface. Good rim tape should be continuous, no gaps or tears, and wide enough to cover every single spoke hole with about a quarter inch of overlap on each side.
Damage isn’t always obvious. Sometimes it’s a visible rip. Sometimes the tape has shifted toward one side of the rim, leaving a spoke hole exposed on the other side. Sometimes it’s just worn translucent — thinner than paper where it used to be substantial.
If you find damage, the tape comes off entirely and gets replaced. Schwalbe and Mavic both make solid rim tape kits — around $12 to $18 per roll depending on width. Traditional cloth tape is cheaper but needs careful application and usually wants re-tensioning after a few rides. Width matters here: 21mm for narrow road rims, 25mm to 30mm for wider mountain bike rims. Match your rim width, not your tire width. That’s a mistake people make constantly.
Installing it takes fifteen minutes. Center it on the rim. Press it down smoothly as you work your way around. Cover every spoke hole, corner to corner. Reinstall the valve stem grommet. That’s it.
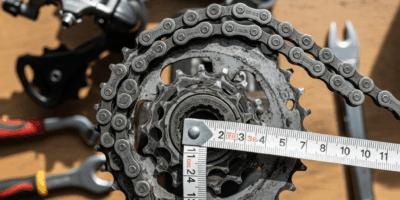
Finding a Micro-Puncture That Is Too Small to See
Sometimes the tube has a hole so tiny that air escapes in complete silence. No hiss. No visible mark. Just gradual pressure loss every single night.
The water submersion method finds these reliably — at least if you’re willing to get your hands wet. Fill a bathtub or a large bucket. Inflate the tube slightly so it holds its shape without being rock hard. Submerge it completely and slowly rotate it through the water, watching every inch of the surface closely.
When you find the leak, mark the spot immediately with a permanent marker. A Sharpie works fine. Mark it relative to the valve stem too — that way you can figure out exactly where it sits on the actual tire once everything is reassembled.
Now inspect the tire at that exact location. This step is critical and most people skip it entirely. If the puncture came from a glass shard or a wire fragment, that object is almost certainly still embedded in the tire casing or tread. Patch the tube and reinstall it without removing the cause? Same sharp thing punctures your new tube within two days. Guaranteed.
Look for a dark speck, a glint of metal, a fabric snag. Sometimes visible, sometimes not. Run your finger carefully inside the tire to feel for it. Wire fragments need pliers. Glass needs tweezers. Get it completely out — not halfway, completely.
Then patch the tube using a standard patch kit. Rema Tip Top makes excellent patches, around $6 for a full kit. Reinstall everything and you’re done.
When to Stop Patching and Just Replace the Tube or Tire
At some point, patching becomes theater. You’re going through the motions without actually solving anything.
Replace the tube if you have more than two patches in it already, or if it holds air on the bench but goes flat the moment you ride it. Replace the tire if you see visible sidewall cracking, casing separation, or tread worn down to the canvas underneath. That was the situation with my old Continental Contact — I patched it four times over one winter before finally admitting the casing was just done.
A replacement tube runs $10 to $20 depending on valve type and size. A decent commuter tire replacement is $30 to $80. These aren’t luxuries once you’ve worked through all the real fixes — they’re just necessities.
For riders who’ve had five flats in two months, tubeless conversion is worth considering. But what is tubeless, really? In essence, it’s a setup using liquid sealant that automatically clogs small punctures from the inside. But it’s much more than that — it’s a fundamentally different approach to how your tire holds air. That’s a longer conversation for another day, honestly. Just know the option exists once the traditional route stops working for you.


Stay in the loop
Get the latest cycling gear galaxy updates delivered to your inbox.