What Gear Skipping Under Load Actually Means
Bike maintenance has gotten complicated with all the conflicting advice flying around. But gear skipping under load? That one has a clear cause — and an even clearer fix, once you know where to look.
You already know the feeling. You’re climbing out of the saddle, standing on the pedals, pushing real watts into the drivetrain — and suddenly the chain lurches forward and catches. Violent. Jarring. Honestly a little scary the first time it happens.
But what is gear skipping under load? In essence, it’s the chain momentarily losing contact with the cassette teeth and snapping back under pedaling force. But it’s much more than that. It’s a specific symptom pointing to a specific set of causes — and that specificity is everything.
General shifting problems — slow upshifts, reluctant downshifts, mystery noise — point to cable tension, limit screws, or derailleur alignment. Skipping under load points somewhere else entirely. Your drivetrain is losing grip. The chain is stretched, or it’s running over worn teeth, or the derailleur angle is off. Three distinct problems. Three distinct fixes.
Most of these cost under fifty dollars and take under an hour. So, without further ado, let’s dive in.
Start Here — Check Cable Tension First
Probably should have labeled this section “Don’t Make My Mistake.” I spent $94 on a new Shimano cassette before realizing my derailleur cable had just gone slack. That was frustrating. Don’t make my mistake.
A stretched cable nudges the derailleur slightly out of position. At low pedal pressure, the chain still sits on the teeth — the derailleur micro-adjusts through the cable play. But the moment you stand up and load the drivetrain hard, the chain pulls sideways under force. It jumps teeth. That’s it. That’s the whole mechanism.
Cable stretch happens gradually. You don’t notice it until the symptom appears.
To check tension, shift into the smallest rear cog and look at the derailleur from directly behind the bike. The upper pulley — the jockey wheel guiding the chain — should sit almost directly below that cog. Not a few millimeters off. Almost directly.
Grab the cable with two fingers where it exits the shifter housing. Pull gently. You want light resistance, like plucking a barely-tuned guitar string. If it moves a full inch without effort, it’s too loose.
The fix is straightforward. Find the barrel adjuster — usually where the cable enters the derailleur body. Turn it counterclockwise in quarter-turn increments. Each quarter turn creates a small but measurable change in derailleur position. After each adjustment, shift back to the small cog, check alignment, and test under hard pedaling.
If the skipping disappears, you’re done. Five minutes. Zero dollars.
Most riders under-tension their cables. Over-tensioning is rare. If you’ve turned the barrel adjuster five or six full rotations and still have skipping, cable tension isn’t your problem — move on.
Inspect Your Chain for Stretch and Wear
As someone who has gone through three cassettes that didn’t actually need replacing, I learned everything there is to know about diagnosing chain wear the expensive way. Today, I will share it all with you.
Chains stretch over thousands of miles. The rollers and pins wear fractionally. The links get slightly longer. New cassette teeth are shaped to mesh with new chain pitch — a stretched chain sits just far enough off that mesh that under load, it can’t grip. It skips.
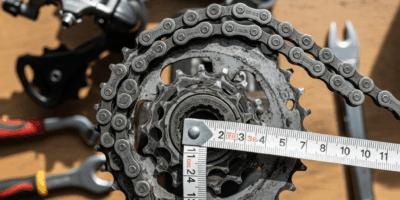
You need a chain wear indicator. The Park Tool CC-3.2 costs around $12 and fits any standard chain. Two prongs. Hook it between links. If it clicks in easily, the chain is fine. If it sinks in and seats flush, the chain is stretched past acceptable limits — 0.75% elongation, which is the point of no return.
Replace it immediately once you hit that threshold. A new chain on a worn cassette will still skip. But catching chain wear early — before it hooks the cassette teeth — is vastly cheaper than replacing both.
I’m apparently hard on drivetrains and the CC-3.2 works for me while eyeballing chain wear never does. Measure in at least three spots along the chain. The first several inches often wear faster than the middle section. Any stretched section means the whole chain is done.
Remove the old chain with a chain tool, count the links, and buy a replacement with the same count. Sram, Shimano, KMC — all work fine in any modern drivetrain within reason. Install the new chain, index the derailleur, and test under hard pedaling. If chain wear was the culprit, the skipping stops immediately.
Check the Cassette for Shark-Fin Teeth
If the new chain didn’t fix it, get a flashlight. This part of the diagnosis is entirely visual — and once you see worn cassette teeth, you can’t unsee them.
Healthy teeth have an even, slightly rounded profile. Worn teeth point backward like shark fins. A new chain sitting on a hooked tooth is like a ladder rung sitting in open air — no grip, nowhere to catch. The chain skips the moment you push hard.
Spin the smallest cog slowly by hand while shining the light at the teeth profile from the side. Do the teeth curve backward like hooks? Do the first two teeth on each cog look sharper and more pointed than the rest?
Compare them to the largest cog — large cogs wear slower because they spread load across more teeth. The difference between a worn small cog and a healthy large cog is obvious once you’re looking for it.
You can’t sharpen a cog back to its original profile. Cassette replacement is the only fix. A mid-range 11-speed cassette runs $30 to $60 depending on brand — a Shimano 105 CS-R7000 sits around $45. A top-tier cassette crosses $100 easily. Shop labor for the swap is another $30 to $50 if you’d rather not do it yourself.
That’s what makes a clean diagnostic order endearing to us home mechanics — testing cable tension and chain wear first costs almost nothing. If both check out clean, you know the cassette is the problem before you’ve spent a dollar on parts.
When to Look at the Derailleur Hanger
You’ve tightened the cable. You’ve replaced the chain. You’ve inspected the cassette teeth. Skipping persists. The derailleur hanger is bent — and this one surprises people every time.
Frustrated by the cost of frame repairs after crashes, bike engineers designed the derailleur hanger as a sacrificial aluminum extension bolted to the frame’s rear dropout. The derailleur bolts to the hanger, not the frame directly. When you hit a curb, bounce the bike off a rock, or catch the derailleur on trail debris, the hanger bends instead of the frame. The whole point is that it’s cheaper to replace a $20 hanger than a $500 dropout. This new idea took off several years later and eventually evolved into the sacrificial hanger system enthusiasts know and rely on today.
A bent hanger tilts the derailleur slightly inboard or outboard. At low effort, the chain sits on teeth fine. But load the pedals hard and the chain pulls perpendicular to the slightly-angled derailleur — the angle compounds under force. Chain skips.
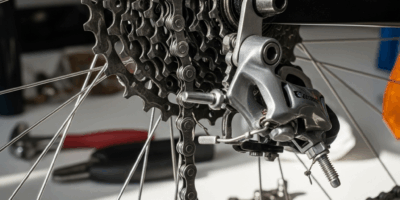
Check this at home without tools first. Shift into the largest cog. Look at the upper jockey wheel from directly behind the bike. Is it sitting directly underneath the cog, or tilting slightly inward or outward? Any tilt is a red flag.
The Park Tool DAG-2 hanger alignment tool costs around $30 and lets you check vertical alignment precisely, then bend the hanger back into spec using the tool as a lever. If that sounds fiddly, a shop will do the alignment for $20 to $30.
Replacement hangers are often cheaper than the tool anyway — most bike-specific hangers run $15 to $30. Unbolt the derailleur, swap the hanger, reinstall the derailleur. Ten minutes. While you won’t need a full workshop for this, you will need a handful of basic hex keys and about fifteen minutes of patience.
Here’s the full diagnostic checklist in order. Start cheap and simple. Move to harder fixes only after ruling out earlier ones:
- Tighten the derailleur cable using the barrel adjuster (five minutes, zero dollars)
- Check chain wear with a Park Tool CC-3.2 wear indicator (five minutes, $12)
- Visually inspect cassette teeth for shark-fin hooking (five minutes, zero dollars)
- Check and correct derailleur hanger alignment (ten minutes, $15–$30 for replacement)
Ninety percent of skipping under load disappears at step one or two. If you reach step four, multiple wear issues stacked up over time — that happens. But you’ll fix it in order, spending money only when free diagnostics come up clean first.

Stay in the loop
Get the latest cycling gear galaxy updates delivered to your inbox.