
What Slow Shifting Actually Feels Like
Bike shifting has gotten complicated with all the conflicting advice flying around. You reach for a gear change — maybe you’re grinding up a climb and desperately need to drop down, or you’re spinning out on the flats — and the derailleur just… takes its time. Sometimes it misses the cog entirely on the first click. You tap the lever. Nothing. Tap again. Finally it shifts, but you’ve already lost momentum or rattled through a half-second of pure mechanical chaos.
Front derailleur? Same miserable story. The cage crawls toward the big ring when you’re pushing hard, or it flat-out refuses to drop under load. Multiple lever presses. Audible grinding. That grinding is your frustration, just with metal.
If this sounds like your last three rides, you’re in the right place. Most articles will tell you to spin the barrel adjuster and call it done. I’m going to show you the actual sequence — the one that works. So, without further ado, let’s dive in.
Start Here — Check Your Cable Tension First
Cable tension is responsible for maybe 60% of sluggish shifts. Probably more on older bikes. When tension runs low, the cable can’t yank the derailleur hard enough to snap it into position. The shifter clicks. The cable twitches. The derailleur crawls.
Here’s the tell: upshifts feel delayed, but downshifts work fine. That asymmetry is the signature of low cable tension. Downshifts rely on the return spring, not cable pull — so they feel totally normal even when tension is weak. That’s what makes this symptom so easy to misread.
The Barrel Adjuster Fix
Find the barrel adjuster on your derailleur cable. On a rear derailleur, it sits where the cable exits the derailleur body. On a front derailleur, check near the seat tube. It’s a threaded cylinder — usually black plastic with a knurled grip, though some nicer setups use aluminum.
Shift to the smallest cog (rear) or smallest ring (front) first. This gives you slack. Now turn the barrel adjuster counter-clockwise — that’s outward, away from the derailleur — in quarter-turn increments. Two full rotations maximum. Test after each quarter turn.
What you want is a single decisive click and an instant snap onto the next cog. No hesitation. No second press required.
Gone too far? You’ll know. Over-tensioned cable causes the derailleur to overshoot, chatter across multiple cogs, or refuse to reach the largest cog entirely. Back it off a quarter turn clockwise and test again.
This fix takes under two minutes. Zero tools. If it works, great — but keep reading anyway. Secondary issues like to hide underneath the obvious ones.
Inspect the Cable and Housing for Wear
Still shifting like you’re moving furniture? Cable and housing wear is probably your culprit. Even with perfect tension, a frayed inner cable or contaminated housing creates enough friction to put the whole system in slow motion. You can spin the barrel adjuster until your fingers give out. Nothing changes.
Here’s what I didn’t understand for an embarrassingly long time: housing degrades from the inside out. It can look absolutely fine on the outside while the internal walls are cracked, compressed, or coated with dried lubricant that’s turned basically into concrete. Don’t make my mistake of assuming clean-looking housing is functional housing.
What to Look For
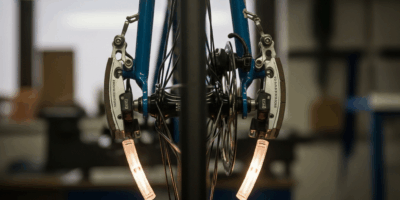
Pull the shifter lever and watch the cable move. It should glide. If it stutters or drags, suspect the housing immediately. Now look at the cable where it exits the shifter and enters the derailleur body. A healthy cable gleams silver. A worn cable shows its age — fraying at the anchor point, rough texture, sometimes a brownish oxidation creeping along the strands.
Run your thumb and forefinger along the cable length. Fraying feels like a tiny wire brush. That’s your answer right there.
Housing inspection is trickier since the damage hides inside. Look for cracks, kinks, or crushed sections. Check each ferrule — that small metal or plastic cylinder capping each end of the housing. A dented ferrule means water and grit have gotten in, and whatever’s inside is probably not pretty.
Most mechanics replace cable and housing every two to three years for regular riders. In wet climates, annual replacement is honest maintenance, not paranoia. A complete cable-and-housing set runs $12–$25 depending on quality — Jagwire or Shimano OEM are both solid choices at that price range.
Clean and Free Up Your Derailleur Pivots
Probably should have opened with this section, honestly — because it’s where most diagnoses fall apart. Most riders assume that if the derailleur moves at all, the pivots are fine. They’re not.
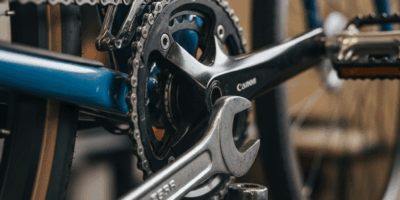
The parallelogram linkage — those pivot points where the cage connects to the mounting bracket — can seize up with dried lubricant, road salt, and brake dust. Cable tension is perfect. Housing is clean. But the derailleur moves like it’s wading through wet cement. Each shift requires serious finger pressure. The whole system feels dead and disconnected.
Frustrated by a shift problem I couldn’t diagnose, I spent nearly an hour adjusting barrel adjusters and swapping cables before finally touching the pivots themselves. The fix took five minutes with a rag and a $6 bottle of Tri-Flow. That was a humbling afternoon.
How to Clean and Lubricate
You don’t need to pull the derailleur off the bike. Spray a light penetrating oil — Tri-Flow, 3-in-1, or even thin chain lube — directly onto each pivot point where the cage assembly connects to the bracket. Depending on your derailleur model, you’ll see two or three pivot bolts total.
Work the lever back and forth 20 or 30 times without pedaling. The oil creeps into the joint, breaks up dried grease, and frees the mechanism. Shift through your full gear range. You should feel an immediate difference — faster engagement, smoother response, less effort from your fingers.
Wipe the excess oil off with a clean rag so it doesn’t fling onto your rim or rotor. Done.
When the Problem Is the Shifter Itself
But what if the shifter is the actual problem? In essence, it’s the small pawls and ratchets inside the lever body — the components that catch and release with each click — and they can gum up badly with old grease or accumulated grit. But it’s much more than just dirty grease; sometimes it’s internal wear that no amount of cleaning fixes.
A light solvent spray can sometimes free seized pawls. Shift the lever through all positions while spraying a degreaser — citrus-based cleaners or light chain cleaner both work — directly into the lever mechanism. Work the lever hard. Let it soak for 60 seconds. Work it again.
Sometimes this helps dramatically. Sometimes it does nothing. I’m apparently someone who rides through winters, and Shimano’s older 105 levers gummed up on me twice while my friend’s SRAM setup never had this issue. Apparently brand matters here.
If the shifter is ten years old and came on a budget build, internal wear may simply be too far gone. At that point, replacement is the actual solution — not another adjuster turn, not another cleaning session. New shifters run $30–$80 per unit depending on your component group. That’s faster and cheaper than chasing a ghost.
Walk through these steps in sequence. Most riders find their fix in the first two sections. The rest will hit their answer at the derailleur pivots. Trust the order — it exists for a reason.


Stay in the loop
Get the latest cycling gear galaxy updates delivered to your inbox.