What Truing Actually Means and When to Do It
Wheel truing has gotten complicated with all the conflicting advice flying around. As someone who once spent forty-five minutes chasing a ghost wobble on a perfectly rideable wheel, I learned everything there is to know about fixing this the hard way. Today, I will share it all with you.
This article includes affiliate links. We may earn a commission at no extra cost to you.
But what is truing, exactly? In essence, it’s correcting lateral wobble — the side-to-side drift you see when a rim spins. But it’s much more than that. There’s also radial hop, where the rim bounces in and out like a bad tire. That’s a different problem entirely. Usually signals a bent rim or hub damage. That one doesn’t get fixed in your garage on a Sunday afternoon.
Spin the wheel slowly. Watch the rim. Mark the spot where it swings furthest from center — a small piece of blue painter’s tape works perfectly here. Under 3mm of wobble with no visible cracks? You’re fixing this at home. The method works across cantilever brakes, rim brakes, and disc setups. All you need is the bike frame itself and something solid to reference against.
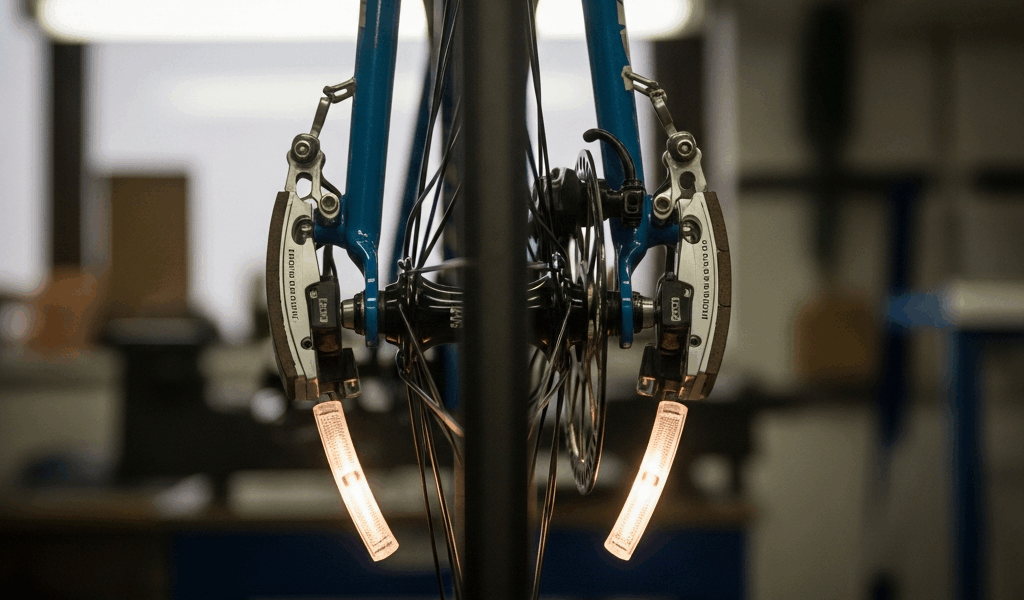
Using Your Brake Pads as a Reference Point
Rim brakes are honestly the easiest starting point. Two pads already sitting a few millimeters from the rim — your reference is already built in. Spin the wheel and just listen. One side rubs first. That rub point is your high spot. Stop there.
Look at exactly where pad meets rim. Mark it with white tape or a chalk line drawn straight across. That mark becomes your visual anchor for everything that follows. Spin again and watch the tape creep toward the pad. That’s the feedback loop you’re working with.
Probably should have opened with this section, honestly — disc brake bikes need a makeshift reference instead. A zip tie threaded through the fork so the loose end sits roughly 2mm from the rim does the job perfectly. Tighten it until it barely kisses the high spot on each rotation. Mark that contact point with a permanent marker. Done.
Some riders hold a marker steady against the fork leg and let the spinning rim draw its own line. Either approach works fine. The goal is dead simple: find where the rim sits furthest from center. Everything else follows from that single mark.
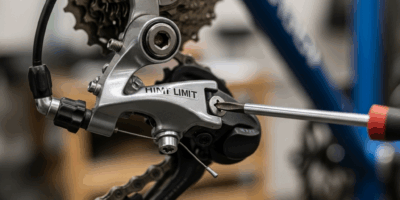
How to Tighten and Loosen Spoke Nipples Correctly
This is the part where most guides lose people completely. Here’s the counterintuitive bit — looking down at the wheel from above, righty-tighty does NOT apply the way your brain expects. Turning the nipple clockwise from above actually tightens it. The threads are inverted to stop nipples from backing out during riding. Don’t make my mistake and spend twenty minutes tightening the wrong direction.
Find the spoke nipple directly opposite your marked wobble. Rim drifting toward you at 12 o’clock? Your adjustment happens at 6 o’clock. Tightening spokes on the opposite side pulls the rim back toward center — most beginners tighten the spokes on the wobble side itself and make things dramatically worse.
A universal spoke key runs about six dollars at any decent bike shop. Park Tool makes a good one, the SW-2, but honestly the six-dollar generic fits 95 percent of nipples just as well. You do not need a $150 specialty tool. Start with quarter-turn increments — roughly 90 degrees on the key. Spin. Check. A noticeable wobble might need a half turn or even a full turn, but working in small steps prevents the classic overshoot problem.
One hard warning: spoke nipples crack if you force them. I learned this the expensive way on a 1996 Campagnolo wheel that wasn’t worth replacing afterward. The nipple sits in a small brass seat inside the rim. Pull too hard and you’ll either crack the nipple clean or drag it straight through the rim bed. Snug is the goal — not vice-grip.
Step-by-Step Truing Process Without Any Special Tools
- Spin the wheel slowly and identify the wobble direction. Moving toward you or away? Mark the high spot with tape or a marker line — be specific about the exact location on the rim.
- Locate the spoke nipples sitting directly opposite that marked spot. Count spokes if you need to — most bikes run 32 or 36, so the opposite spoke lands predictably.
- Using the spoke key, make one quarter-turn adjustment on the spoke opposite the high spot. Clockwise from above to tighten. That’s it for now.
- Spin the wheel again. Wobble should shrink. If it got worse — and this happens — you’ve adjusted the wrong direction. Reverse the adjustment and go the other way.
- For wobbles larger than 4mm, use the two-spoke rule. The primary spoke opposite the wobble gets the main adjustment. The spokes immediately adjacent — one position clockwise, one counterclockwise — each get roughly half that adjustment. This spreads the correction out instead of punching a sharp dip into the rim.
- Another quarter turn, another spin. Repeat. The wobble shrinks with each pass — at least if you’re adjusting the right spokes in the right direction.
- Once you’re close, drop to eighth-turn increments. You’re chasing millimeters at this point. Less is genuinely more here.
- Final spin — watch the wheel through at least three full rotations with everything relaxed. Wobble creeping back after each spin means a spoke is slipping, which means you need slightly more overall tension across that section.
When DIY Truing Is Not Enough
Be honest about what you’re actually looking at before touching a single nipple. Visible crack in the rim? Truing won’t fix it — that’s a replacement conversation. Three or four broken spokes? This method buys you maybe ten miles, not a long-term solution. Wobble running past 5 or 6mm usually signals something structural rather than simple tension loss.
A professional wheel true at most shops runs $20 to $40. I’m apparently someone who resists shop visits on principle, and even I think that price is genuinely reasonable for a wheel you depend on daily. After an hour of adjustments going nowhere, that shop visit stops being optional. There’s no shame in recognizing when a job has exceeded DIY scope.
That’s what makes this method endearing to us home mechanics — it handles real-world maintenance wobbles, trailside fixes when a wheel gets knocked out of true ten miles from the car, garage repairs with zero special equipment. But it is not a substitute for professional service when a rim is genuinely damaged. Knowing that difference keeps you safe and keeps your afternoons from disappearing into a wheel that was never going to cooperate.


Stay in the loop
Get the latest cycling gear galaxy updates delivered to your inbox.