Best Indoor Cycling Setup on a Budget — Under $500 Total
Indoor cycling has gotten complicated with all the sponsored gear guides and “budget-friendly” $1,200 trainer recommendations flying around. As someone who has built multiple home setups from scratch — for myself and a few training partners — I learned everything there is to know about squeezing real performance out of minimal spending. And here’s the thing: a genuinely functional smart trainer setup, complete with a rideable bike, a mat, a fan, and free structured workouts on your screen, fits comfortably under $500. Not $500 after compromises. Just $500.
This article includes affiliate links. We may earn a commission at no extra cost to you.
The baseline assumption in most indoor cycling content is broken from the first paragraph. Every article starts with a $1,200 direct-drive trainer and calls $800 a “budget” option. That’s not budget. That’s just less expensive. The gap between a $500 rig and a $2,000 one is genuinely smaller than the cycling industry wants you to believe — and I’d rather show you the actual numbers than dress it up.
Our Top Budget Picks
This section includes affiliate links. We may earn a commission at no extra cost to you.
Wahoo KICKR SNAP Smart Trainer
Reliable wheel-on smart trainer with Bluetooth and ANT+ connectivity
$349.99
Check Price on AmazonElite Suito-T Direct Drive Trainer
Direct-drive smart trainer with +/-2.5% accuracy and included cassette
$499.99
Check Price on AmazonCooSpo H808S Heart Rate Monitor
Budget Bluetooth and ANT+ chest strap with 300-hour battery life
$35.99
Check Price on AmazonThe $500 Budget Breakdown
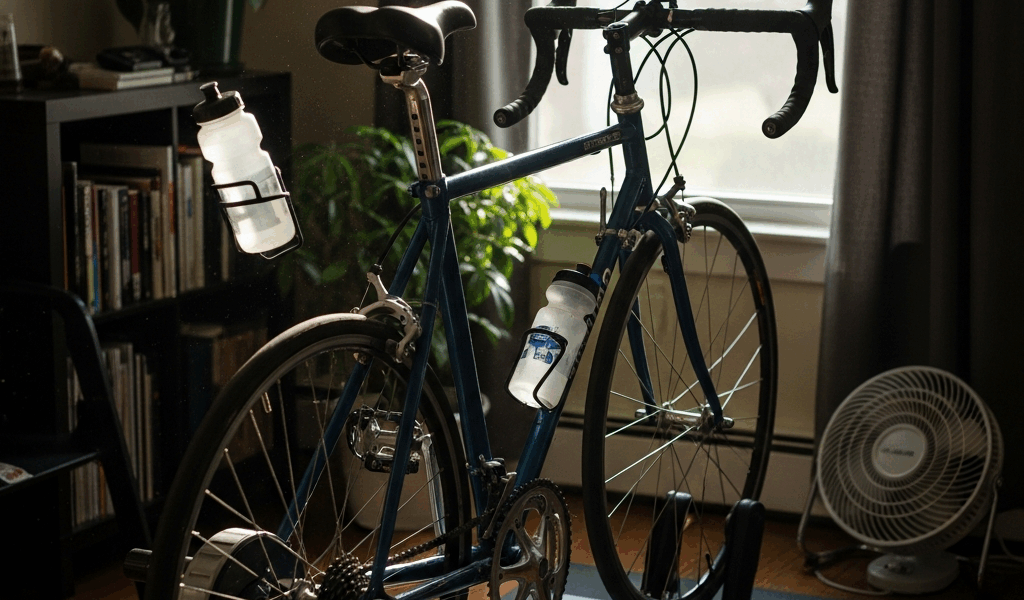
Probably should have opened with this section, honestly. Budget allocation kills more good intentions than the wrong gear ever could. People get excited about the trainer, drop $350 on it, then realize they’ve got $150 left for a bike, a mat, and everything else. That’s how you end up standing in your garage holding a smart trainer with nothing to attach it to.
Here’s how I’d split $500 across the full setup:
- Trainer — $150 to $220 (used wheel-on or entry-level direct drive)
- Bike — $100 to $150 (used road or hybrid, Craigslist or Facebook Marketplace)
- Floor mat — $25 to $40 (a 3×6 equipment mat from any sporting goods store)
- Fan — $20 to $35 (box fan or small tower fan)
- Misc cables and app — $0 to $30 (most apps have free tiers; more on that below)
Total lands between $295 and $475 — which leaves a small buffer for the things you forget exist until you need them. The bike category is where most people get nervous. Don’t be. Used bikes are everywhere, and most of them are perfectly fine for trainer use. You’re not descending at 45 mph. You’re pedaling in your basement. A $120 road bike with a 700c rear wheel that fits a standard trainer skewer is everything you need.
Don’t make my mistake: I bought the trainer first, then hunted for a compatible bike. Do it the other way. Find a bike, confirm the rear dropout width — 130mm for road, 135mm for most hybrids — then buy the trainer. Saves a painful amount of back-and-forth.
Best Budget Smart Trainers Under $300
Let’s be specific here. Vague recommendations are useless.
Wahoo KICKR SNAP — Used, Around $150 to $200
Frustrated by $500-plus price tags on new smart trainers, I ended up finding a used KICKR SNAP on Facebook Marketplace for $165 — power cable included, no drama. This is the wheel-on trainer Wahoo made for years. Not the flagship, but it talks to Zwift over Bluetooth and ANT+ without complaint, the resistance unit holds up, and replacement parts are still around if something eventually wears out.
Wheel slip is a real thing with the SNAP if you don’t dial in the roller tension. Run Wahoo’s in-app calibration once, set it, and leave it alone. Reported accuracy is around ±5%, which matters if you’re training to strict power zones — less so if you’re trying to sweat through 45-minute sessions three times a week. That’s what makes the SNAP endearing to us budget-minded riders: it’s honest about what it is.
Elite Suito — Occasionally Available Under $300 Refurbished
But what is a direct-drive trainer, really? In essence, it’s a trainer where you remove your rear wheel entirely and attach the bike directly to the unit’s cassette. But it’s much more than that — no wheel slip, noticeably quieter, more accurate power readings. The Suito comes with an 8-speed cassette included, a detail most trainers quietly skip, and refurbished units show up on the Elite website and Amazon Warehouse in the $240 to $290 range.
Direct drive under $300 is genuinely good value. Power accuracy sits at ±2.5%, ANT+ FE-C and Bluetooth FTMS support means it works with every major app, and at about 12kg it’s not going anywhere once you set it up. If you can catch a refurb, this is the better buy over a used wheel-on trainer — full stop.
Saris M2 — Used Around $120 to $160
The Saris M2 — previously branded CycleOps, apparently — is another wheel-on smart trainer worth tracking down. Slightly lighter than the SNAP, reliable magnetic resistance, and the brand was making trainers long before “smart” was a word attached to them. Look for used units from 2018 to 2020 specifically. Those were the best production years. Avoid anything missing the power cable or showing damage to the resistance unit — that’s a parts hunt you don’t want.
Free and Cheap App Options
You do not need to pay $15 a month to ride indoors. Not yet. The free app ecosystem for indoor cycling is surprisingly robust right now, and paid tiers can wait until you know this habit is actually sticking.
MyWhoosh — Completely Free
MyWhoosh might be the best starting option, as indoor training requires motivation above all else. That is because a platform that’s free, fully featured, and actively competing for market share has every incentive to keep improving. Virtual worlds, structured workouts, smart trainer control, a real race scene — all at $0. Runs on iOS, Android, Apple TV, and Windows. The Abu Dhabi-backed platform is chasing Zwift hard, which means the free tier is feature-complete, not a crippled demo. Start here.
Zwift Free Trial — Then Evaluate
Zwift offers a free trial — usually 7 days, occasionally stretched to 30 days through partner offers. Use it. Zwift’s gamification and world design are legitimately motivating in a way that’s hard to explain until you’ve experienced it. If you end up enjoying it, $14.99 a month is reasonable once you’re riding consistently. There’s also a limited free tier now covering certain routes — worth checking current terms since it’s shifted a few times over the past year.
First, you should try the trial before subscribing — at least if you’re genuinely trying to stay under budget. Don’t hand over a credit card number before you know you’ll use it.
Rouvy — Free Tier Available
Rouvy uses augmented reality video of real roads. You’re watching actual footage — climbs in Mallorca, Alpe d’Huez, roads I’ll never afford to fly to — while your trainer adjusts resistance to match the gradient. The free tier includes enough routes to figure out whether the format works for you. Paid tier runs $10 a month, lower than Zwift, and worth it if real-road visuals beat virtual worlds for you.
TrainerRoad — Budget Reality Check
TrainerRoad is $19.95 a month with no meaningful free tier. Skip it for now. It’s excellent structured training software — genuinely excellent — but it’s not a budget-phase purchase. Come back in six months if you’re still riding and want periodized plans built around your actual fitness data.
The Minimum Viable Setup
Here’s what you actually need for a functional indoor training session:
- A bike that fits the trainer
- A trainer with Bluetooth connectivity
- A phone, tablet, or laptop to run an app
- A mat under the trainer (sweat and floor protection)
- Water
That’s it. Seriously.
You don’t need a heart rate monitor to start. HR monitors are useful for understanding training load, but for the first month you’re building the habit, perceived exertion is fine. You don’t need a power meter — your smart trainer estimates power. You don’t need a cadence sensor — most apps pull cadence estimates from trainer data. You don’t need a speed sensor either, for the same reason.
The cycling world is full of people who’ll tell you that you need a 4iiii power meter to “validate” your trainer’s numbers. For someone building a home setup on $500? That’s noise. Ride consistently for 60 days, then look at what gaps you actually feel.
One real thing you need that I almost left off this list: a front wheel block. It’s a small plastic wedge — costs $8 to $12 on Amazon — that elevates your front wheel to match the height of your rear axle sitting in the trainer. Without it, your bike angles slightly downhill, which feels wrong and loads your wrists in a way they’ll complain about by week three. Get one when you order the mat.
Upgrade Path — What to Add First When Budget Allows
Burned by buying things in the wrong order more than once, I’d suggest a specific sequence for adding to this setup as money frees up.
First — A Decent Fan ($30 to $60)
Your indoor ride quality is limited more by heat than by any piece of hardware. Outside, you generate 20 to 30 mph of airflow just by moving. Inside, you generate nothing. A box fan aimed at your face and chest makes a 30-minute ride feel dramatically better — lets you push harder before your core temperature forces you to back off. Biggest return per dollar in this entire list.
A Lasko 20-inch box fan, model 3723, runs about $28 at Walmart and moves more air than most “cycling-specific” fans sold at four times the price. That specific model. Write it down.
Second — Heart Rate Monitor ($35 to $60)
Once you’re riding consistently, a chest strap HR monitor adds real data to what you’re already doing. The Polar H10 is the gold standard at around $90 — but the CooSpo H808S does the same job for $35 and pairs over Bluetooth and ANT+ without fuss. Heart rate data helps you see whether your easy rides are actually easy and whether your hard efforts are actually hard. Cheapest way to add meaningful training insight to the setup.
Third — App Subscription ($10 to $15/month)
If you’ve been riding for 60 days on free apps and you’re still showing up, now is the time to consider paying. MyWhoosh staying free indefinitely is genuinely great. But if Zwift’s world design is what gets you to clip in three times a week, $14.99 is worth it. Training compliance — actually showing up — beats optimal training methodology every single time.
Fourth — Direct-Drive Upgrade (If Still on Wheel-On)
This new idea took off several years later and eventually evolved into the direct-drive ecosystem enthusiasts know and rely on today. If you started with a used wheel-on trainer and you’re still riding a year in, upgrading makes sense — quieter, more accurate, no tire wear, no calibration fussing. By that point you’ll know what trainer features actually matter to you, and the used market will have turned over again with better options at lower prices.
The $500 indoor cycling setup isn’t a compromise. It’s a starting point. Most people who spend $2,000 on a Peloton ride it for three months and then hang laundry on it. A $500 setup you actually use is worth infinitely more than expensive hardware collecting dust. Get on the bike. The gear can grow with you.


Stay in the loop
Get the latest cycling gear galaxy updates delivered to your inbox.