The Two Types of Brake Squeal Are Not the Same Problem
Bike brake noise has gotten complicated with all the conflicting advice flying around. And honestly, most of it misses the most important thing you need to know before touching anything: rim brake squeal and disc brake squeal are almost completely different problems — with almost completely different fixes.
As someone who wasted an entire afternoon attacking the wrong brake system with the wrong product, I learned everything there is to know about this the hard way. Today, I will share it all with you.
The mistake I made was reaching straight for degreaser on my rim brakes. Methodical, thorough, very confident. The squeal got worse. Turns out rim brakes genuinely hate degreaser — the exact thing that works on disc brakes is wrong here. Don’t make my mistake.
Identify your brake type first. Look at your wheel. Pads squeezing a metal rim? Rim brakes. A thin shiny disc bolted to the hub with a caliper clamping around it? Disc brakes. Jump to the section that matches your setup.
Fixing Squealing Rim Brakes
Rim brake squeal usually traces back to one of three places: contamination on the rim or pads, incorrect pad angle — called toe-in — or pads that have glazed over and hardened. But what is glazing? In essence, it’s when the pad surface hardens and polishes smooth from heat and age. But it’s much more than just cosmetic wear.
Contamination Is the Most Common Culprit
Dust, road grime, and oil build up on your rim over time. When pads press against that dirty surface, they vibrate instead of gripping. That vibration is your squeal.
Here’s what actually works. Isopropyl alcohol — 90% concentration or higher. Grab a clean rag, soak a corner, and wipe down both sides of the rim where the pads contact. Slow, deliberate passes. You’re not scrubbing. You’re dissolving a film. About 30 seconds per wheel is usually enough.
Then clean the pads themselves using the same rag. Three passes minimum per pad surface. You’re removing transfer film — rim material that has bonded to the rubber over time.
I’m apparently someone who grabs whatever spray is nearby, and WD-40 worked for me exactly zero times while Simple Green never fixed anything either. Both leave residue. Isopropyl alcohol evaporates completely. Everything else just sits there and makes things worse.
Toe-In Adjustment
Rim brake pads should strike the rim at a slight angle. The front edge of the pad — closer to the tire — needs to make contact just a hair before the rear edge does. That’s toe-in. It lets the pad grab smoothly instead of slapping flat against the rim and vibrating.
Loosen the bolt holding the pad to the brake arm — a quarter turn is plenty. Then squeeze the brake lever hard and hold it. This lets the pad self-align to its natural contact angle. Tighten the bolt while maintaining that pressure. Done. The pad is now toed-in.
Repeat for both pads on both wheels. Five minutes total, no special tools.
Glazed Pads
Old pads harden. A glazed pad looks almost polished — shiny and smooth where there should be some texture. Glazed pads squeal because they slide across the rim rather than gripping it.
You can scuff them lightly with 220-grit sandpaper to buy yourself some time, but that’s a temporary fix. Replacement pads run $8 to $15 and swap in about 10 minutes. Probably should have opened with this section, honestly — it’s the fix most people eventually end up at anyway.
Wet Conditions Are Not a Problem
Rain ride followed by squealing brakes for the first few minutes? Normal. Water creates a thin film between pad and rim. Friction dries it. The squeal stops on its own.
Nothing is wrong. It goes away.
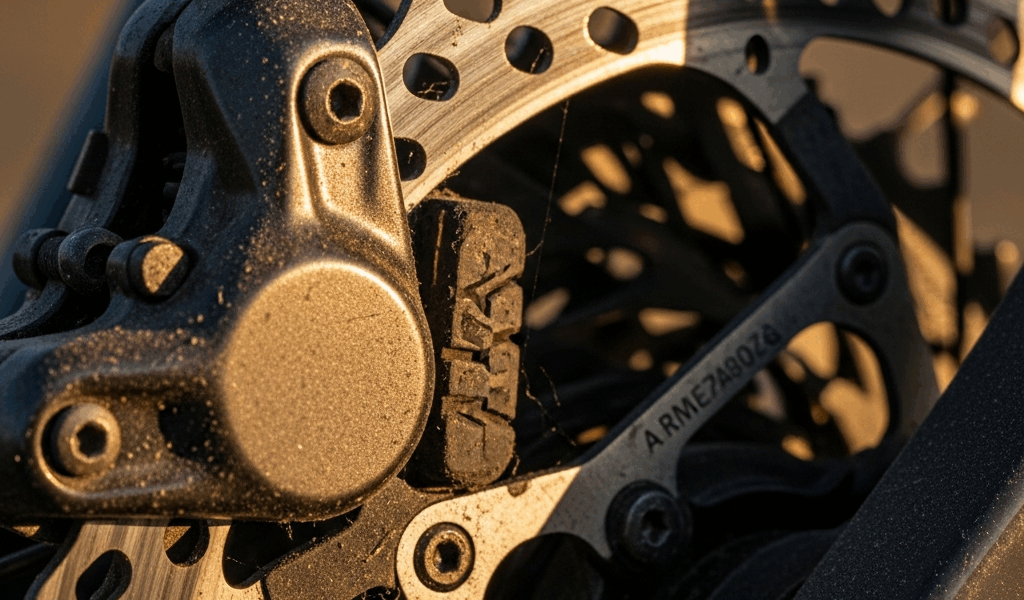
Fixing Squealing Disc Brakes
Disc brake squeal is almost always contamination — but disc brakes are genuinely fussy about it in a way rim brakes aren’t. A single fingerprint on the rotor can cause persistent squeal that won’t quit until that surface is properly clean. That’s not an exaggeration.
Rotor and Pad Contamination
The rotor is where disc brakes get most unforgiving. Microscopic oil from your fingers, chain lube that drifted during a ride, brake dust buildup — any of it causes vibration and noise.
Wipe the rotor down with isopropyl alcohol and a clean lint-free rag. Straight lines from hub to edge — not circles. Both sides. Then clean the pads the same way, several passes each.
When you reinstall the wheel, don’t touch the rotor surface with bare hands. Sounds excessive. It matters. Skin oils transfer instantly. Use the rag to grip the rotor edges if you need to handle it.
Avoid everything else. WD-40, general degreasers, even some bike-specific cleaners leave residue that makes disc brake squeal worse. Isopropyl alcohol is the right tool — at least if you want the noise to actually stop.
Bedding-In New Pads
New disc brake pads need bedding-in before they’ll run quietly. The process lays down a thin layer of pad material onto the rotor surface, creating the friction interface these brakes need to work properly.
Find a safe flat area, ride slowly, and apply moderate brake pressure repeatedly over three to five minutes. Not hard stops — gentle, sustained squeezes. You should feel the brakes get noticeably more responsive. Any squeal present usually fades during this process.
Skip this step and you’ll be listening to that noise for the first several rides instead. New disc brakes almost always squeal initially. That’s what makes bed-in so essential to disc brake owners — it’s just part of the setup.
Rotor Alignment and Caliper Centering
A rotor that rubs lightly against the pads while you’re not braking will squeal constantly. Spin the wheel and watch the rotor. Side-to-side wobble means it needs straightening — a rotor truing tool runs $10 to $25 and handles minor bends easily.
Less common but worth checking: a misaligned caliper. Look at the gap between the rotor and each pad. Equal on both sides? Good. One side significantly wider? Loosen the caliper mounting bolts slightly and center it by hand, then re-tighten. Two-minute fix, costs nothing.
When Cleaning Doesn’t Stop the Squeal
You’ve cleaned everything. Isopropyl alcohol, multiple passes, fresh lint-free rags. Still squealing.
The Pads Themselves Are Contaminated Beyond Repair
Some contamination soaks deep into pad material — past the surface, into the compound itself. Cleaning won’t reach it. Replacement pads run $15 to $40 depending on your brake type, and swapping them out solves it completely. That’s usually your answer at this point.
Bent or Warped Rotors
A rotor with a visible wobble or bend isn’t coming back with cleaning. Replacement rotors cost $20 to $60. Install a new one and the squeal disappears immediately. That was my neighbor’s entire problem last summer — a $28 rotor from the local shop, 20 minutes of work, done.
Loose Hardware
Tap your brake calipers lightly with a plastic mallet. Something rattles? Bolts are loose. Tighten all brake hardware to spec — most torque values fall between 4 and 10 newton-meters, though check your bike’s manual for exact figures. Five minutes, zero cost, surprisingly effective.
Quick Reference — Most Common Fixes by Brake Type
Rim Brakes:
- Clean rim and pads with isopropyl alcohol — 90% concentration or higher
- Adjust pad toe-in by loosening the pad bolt, squeezing the brake lever hard, and re-tightening under pressure
- Replace glazed pads if scuffing with 220-grit sandpaper doesn’t restore surface texture
Disc Brakes:
- Clean rotor and pads with isopropyl alcohol using lint-free rags — straight lines, both sides, no bare hands on the rotor after
- Bed-in new pads with light, repeated braking over three to five minutes in a safe area
- Replace pads or straighten bent rotors if cleaning doesn’t resolve it


Stay in the loop
Get the latest cycling gear galaxy updates delivered to your inbox.