Why Your Chain Is Slipping — Diagnose It First
Chain slipping has gotten complicated with all the conflicting advice flying around. Replace the cassette. No, replace the chain. No, take it to a shop. Everyone’s got an opinion, and most of them will cost you money you didn’t need to spend.
I learned this the hard way — dropped $85 on a brand new cassette, installed it myself, and watched my chain skip all over it anyway. Turns out the chain was the problem the whole time. The old stretched chain had already chewed through my previous cassette, and I’d just given it fresh teeth to ruin.
So here’s your 30-second diagnostic before you do anything else. Find a flat stretch of road. Shift through every gear slowly while pedaling with light pressure — not hammering, just spinning. Notice exactly where the chain skips. Specific gears only? Every gear? Only when you’re pushing hard uphill?
- Skip on specific gears, light pedaling: Derailleur indexing issue (free fix, five minutes)
- Skip across all gears under load: Worn chain or cassette (replacement needed, $25–$80)
- Skip refuses to resolve after adjustment: Bent derailleur hanger or severe wear (shop visit)
Probably should have opened with this section, honestly. It saves you from the scattershot approach most articles take — and from throwing parts at a problem that needs a barrel adjuster, not a credit card.
Check Your Chain for Wear Before Anything Else
But what is chain stretch? In essence, it’s the gradual elongation of your chain’s internal links as the metal wears down. But it’s much more than that — it’s the thing quietly destroying your cassette right now while you ride around wondering why everything feels off.
A stretched chain is the culprit roughly 60% of the time. Also the cheapest fix. A replacement chain runs $20–$35 depending on your drivetrain’s speed count.
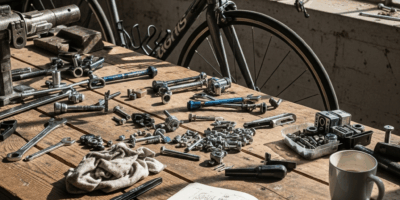
You’ll need a chain checker tool — about $8 at any bike shop or online. The tool looks like a small metal trigger with two measurement pins. Clamp it onto your chain. If the pin drops into the links, you’re done. The threshold is 0.5% stretch for 11-speed and 12-speed drivetrains, 0.75% for 8-speed and 9-speed. While you won’t need a full workshop, you will need a handful of basic tools to do this right.
Don’t have a chain checker? A ruler works fine. Measure from the center of one pin to the center of the pin exactly 12 links forward. New chain: 12.00 inches. If you’re sitting at 12.06 inches on an 11-speed setup, replace it now. I’m apparently obsessive about checking this every 500 miles and a Park Tool CC-4 works for me while the cheap knockoffs never seem to give consistent readings.
Here’s what actually happens when you ignore it. Cassette teeth are spaced 0.5 inches apart — engineered to match a fresh chain’s rollers. A stretched chain’s rollers no longer line up with those valleys. They skip over the peaks instead. The teeth then start wearing into forward-hooked shapes, what mechanics call shark fins, as they desperately try to grab a chain that no longer fits. Once you’ve got shark fins, even a brand new chain will skip on that cassette. The damage is done.
Don’t make my mistake. Check the chain first, every time, before replacing anything else.
Replacing a chain takes about 15 minutes with a chain breaker tool — another $10–$15 investment. Thread the new chain through your derailleur cage, wrap it around the smallest chainring and smallest cog, and use a connecting link to close the ends. KMC and Shimano both include a master link in the box. Test every gear before you actually ride.
How to Adjust Derailleur Indexing to Stop Ghost Shifting
Ghost shifting has gotten a bad reputation as some mysterious mechanical condition. It’s usually not. That random skip on your fourth or fifth cog — the one that comes and goes — is almost always your derailleur sitting a fraction of a millimeter out of alignment. The fix is free and takes under five minutes.
Find the barrel adjuster on your rear derailleur. It’s the cylindrical knob where the cable feeds into the derailleur body. Shift to the middle of your cassette — roughly the fourth or fifth cog on a nine-speed — and pedal lightly by hand if you’re on a stand, or have a friend hold you upright if you’re not. Listen for grinding or chattering against the cage.
Turn the barrel adjuster counterclockwise one quarter turn. That’s it. Pedal again. Listen. Still grinding? Another quarter turn. Keep going until the chain runs completely silent through that cog. Then shift up and down through everything. The clicking should disappear.
What’s actually happening: the barrel adjuster adds or removes tension on the derailleur cable, which physically pulls the cage left or right by fractions of a millimeter. A quarter turn moves that cage roughly 0.5 millimeters — often exactly enough to drop the chain cleanly into alignment with the cog.
Front derailleur dropping the chain or sluggish on the upshift? Same process. Find the barrel adjuster where the cable meets the front derailleur body. Quarter turns, listen for grinding, test all gears. That’s what makes barrel adjustment endearing to us home mechanics — it costs nothing and fixes the problem most riders immediately assume requires a shop visit.
One thing worth knowing: if you’ve turned the barrel adjuster three full rotations in one direction and nothing has improved, stop. Your derailleur hanger is probably bent. That’s a different problem entirely, and no amount of cable tension will fix bent geometry.
When Your Cassette or Chainring Is the Real Culprit
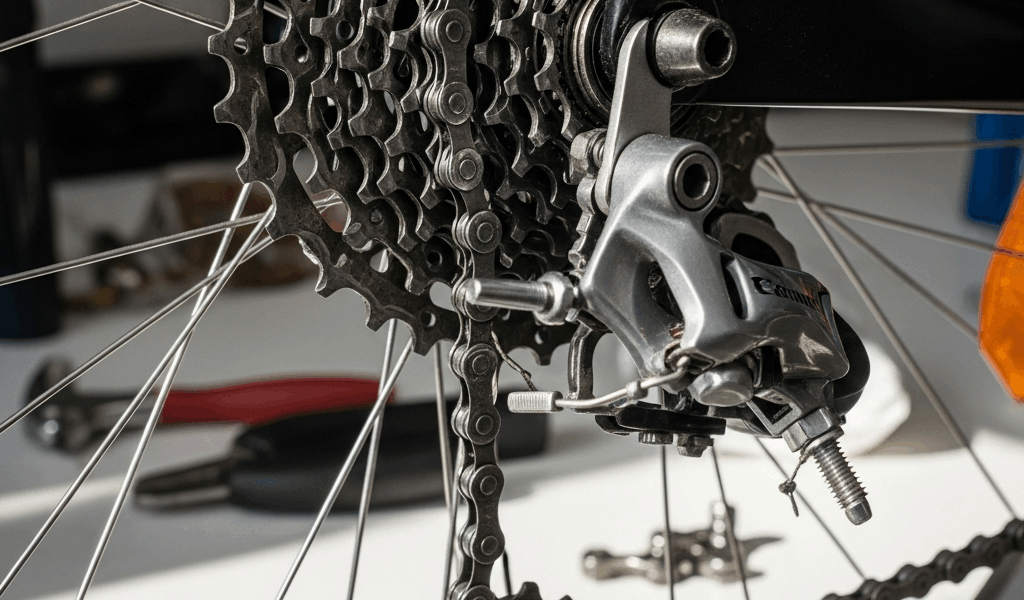
Worn teeth have a look you’ll recognize immediately once you’ve seen it. Spin your rear wheel slowly and look at the cassette from the side — specifically your most-used cogs, usually the middle range. New teeth form a symmetrical triangle, roughly even on both sides. Worn teeth angle forward like a wave about to break. Mechanics call them shark fins. That forward hook is the tooth trying to catch a chain that’s already moved past where it should be.
Cassette wear shows up under load. Light pedaling around the block feels fine — the moment you stand up on a climb or sprint hard through an intersection, the chain jumps. That’s the hook failing to hold the roller under real pressure.
Chainrings wear identically. Look at your large chainring from the side. New teeth point straight down. Worn teeth lean forward. On 1x drivetrains especially, a worn chainring causes chain drop at the worst possible moments — usually mid-climb.
Replacement costs: cassettes run $25–$80 depending on brand and speed count. Shimano’s CS-HG500 10-speed runs about $28 and is genuinely reliable. SRAM and Sunrace make solid options too. Chainrings run $30–$120. You’ll need a lockring tool and a cassette removal tool matched to your specific hub — Shimano freehub and Campagnolo freehub require different tools. First, you should confirm your hub type — at least if you want to avoid ordering the wrong tool twice like I did.
Here’s the thing nobody puts in the instructions: a worn cassette and a worn chain are almost always a package deal. Install a fresh chain on a shark-finned cassette, and the new chain slips immediately — the teeth can’t grab it cleanly. Budget for both components at once, or accept you’ll be having this exact conversation again in a few months.
When to Stop DIYing and Visit a Bike Shop
As someone who has bent two derailleur hangers in three years of riding rough gravel roads, I learned everything there is to know about this particular failure. Today, I will share it all with you — mainly so you don’t spend four hours adjusting a problem that physically cannot be adjusted away.
The hanger is the small aluminum tab your derailleur bolts onto. It’s designed to be a sacrificial part — if you hit something hard, the hanger bends instead of cracking your frame. Smart design. Also means a pothole at the wrong angle or a minor tip-over can quietly bend it inward or outward just enough to ruin your indexing across every cog.
You’ll feel it before you see it. The derailleur won’t index cleanly no matter how many quarter turns you make. The chain rubs the cage in the middle of the cassette — gears that should run silent. For a quick visual check, crouch behind the bike and look directly at your cassette. The derailleur cage should hang parallel to the cogs. If it tilts — even slightly — the hanger is bent.
A bent hanger requires a hanger alignment tool — a long bar with an indicator arm that mechanics use to true the hanger back to parallel. It’s a shop tool, not a home tool. The repair runs $20–$40 at most shops. That’s it. Don’t feel bad about this one — bent hangers happen to every rider who actually rides the bike.
Hanger alignment might be the best option here, as a bent hanger requires precise measurement most home setups can’t provide. That is because the tolerance is measured in fractions of a millimeter over a 150mm arm — close enough to look straight to the naked eye, far enough off to make indexing impossible.
For more drivetrain maintenance and gear guides, explore our full resource library.


Stay in the loop
Get the latest cycling gear galaxy updates delivered to your inbox.